


OCS/ECS - Gem'X
AGA - Sim City 2000

My Vampire V4 Standalone adventure (so far….)
A long time ago… I started to think and ask questions about what, where and how to go forward with my Amiga adventure. To sum up see the following forum thread: https://www.amigaretro.com/index.php/topic,130.0.html
Thanks to a dear friend I became the proud owner of a Vampire V4SA.
A couple of points to note from my experience:
- It is an amazing little machine (a super amiga in a box) very and lots of fun!
- When you have a working “core” and configuration you are happy with “keep it”
- Special Mention – “ApolloBoot” is even more amazing! It brings it to life!
*Please note, much of this is a summation as it happened over several weeks and my memory is not as good as it once was! I should have thought ahead and taken notes too!
Out of the box, for me it worked – thanks to the lucky fact that I happened to have a keyboard and mouse that worked with it, this was not so much by good planning as just luck! As it is very fussy about hardware compatibility.
|
V4SA |
HP USB Keyboard from Current range of HP Mini PC’s |
Amiga USB Optical Mouse (purchased for use with AmiKit originally) |


First Boot was fine on a Phillips 24” LCD Monitor and also an older LG 24” (3 others in my office did not work – the HDMI can also be fussy).
|
|
|


Apart from one or two hangs and reboot issues all ran well in my first explorations.
Default network configuration got me on the Internet quickly too! Likewise loading files from a FAT formatted Micro-SD card went well, got a couple of odd errors doing this but I thought it was just me at the time. Sadly, I did not take any pictures at this point all was going pretty well!
First real hiccup was as mentioned a couple of file errors while copying some files from SD card and then later when trying to download files from the internet to have a go at the new Vampire Games. It would just stop, usually with the green access light hard on.
|
|
|


I visited the forum and joined the discord server for the Vampire and ApolloOS.
Basic suggestions where that it may be an OS and/or core related issue (age), so I updated the core (it was a direct download from the apollo site – smaller files would download fine).
Bang! (Metaphorically) no boot!
|
|

The original OS image supplied on the CF card was too old and would not boot without updates, I was advised the easiest option was to download a new ApolloOS image and try again, so I downloaded the current release.
Great! Booting restored and it looked flasher too 😉 (Had to add the obligatory Sysinfo screen too)
|
|
|


However, the problems continued – same issues - seemingly related to large file downloads or file copies locking up the IDE interface as the access light was almost always on when it locked up.
|
|

At this time I must admit I found the assistance offered to me on the forum and discord was not very helpful, I don't doubt they were trying. It was mainly assuming I must be doing something wrong or playing with settings or burning images wrongly etc! I must be using a non-supported CF card etc.
I asked if I should try an alternative CF card just in case as CF cards had been a major issue for them in the past – hence their recommendation of particular “tested” cards.
I had a 32G CF card and adapter that was part of an AmigaOS 3.1.4 upgrade kit I had purchased and never used, so I decided to give that a go.
|
|
|


Having written a new freshly downloaded ApolloOS image to this card I placed it in the Vampires supplied IDE adapter. It booted up all fine but sadly the same issues continued.
After much continued discission on discord – its probably still on there! And not much help I must say (although many people did try I must admit) I decided to continue with a simple process of elimination and start again swapping items as I go.
In the end I decided to replace the supplied CF card and adapter with the CF card and adapter from the Amiga OS upgrade kit and see how that went – again a new imaged burned to the card first!
And… what do you know it worked!!!! File downloads and copies working 100%!
|
|
|


No body on the forum or discord could believe that a simple adapter with no electronic components could be causing the failure!
To double check this I swapped out the 32G CF with the supplied 128G CF on the new adapter and it was functioning perfectly now too!
Downloaded games away!!!
|
|
|


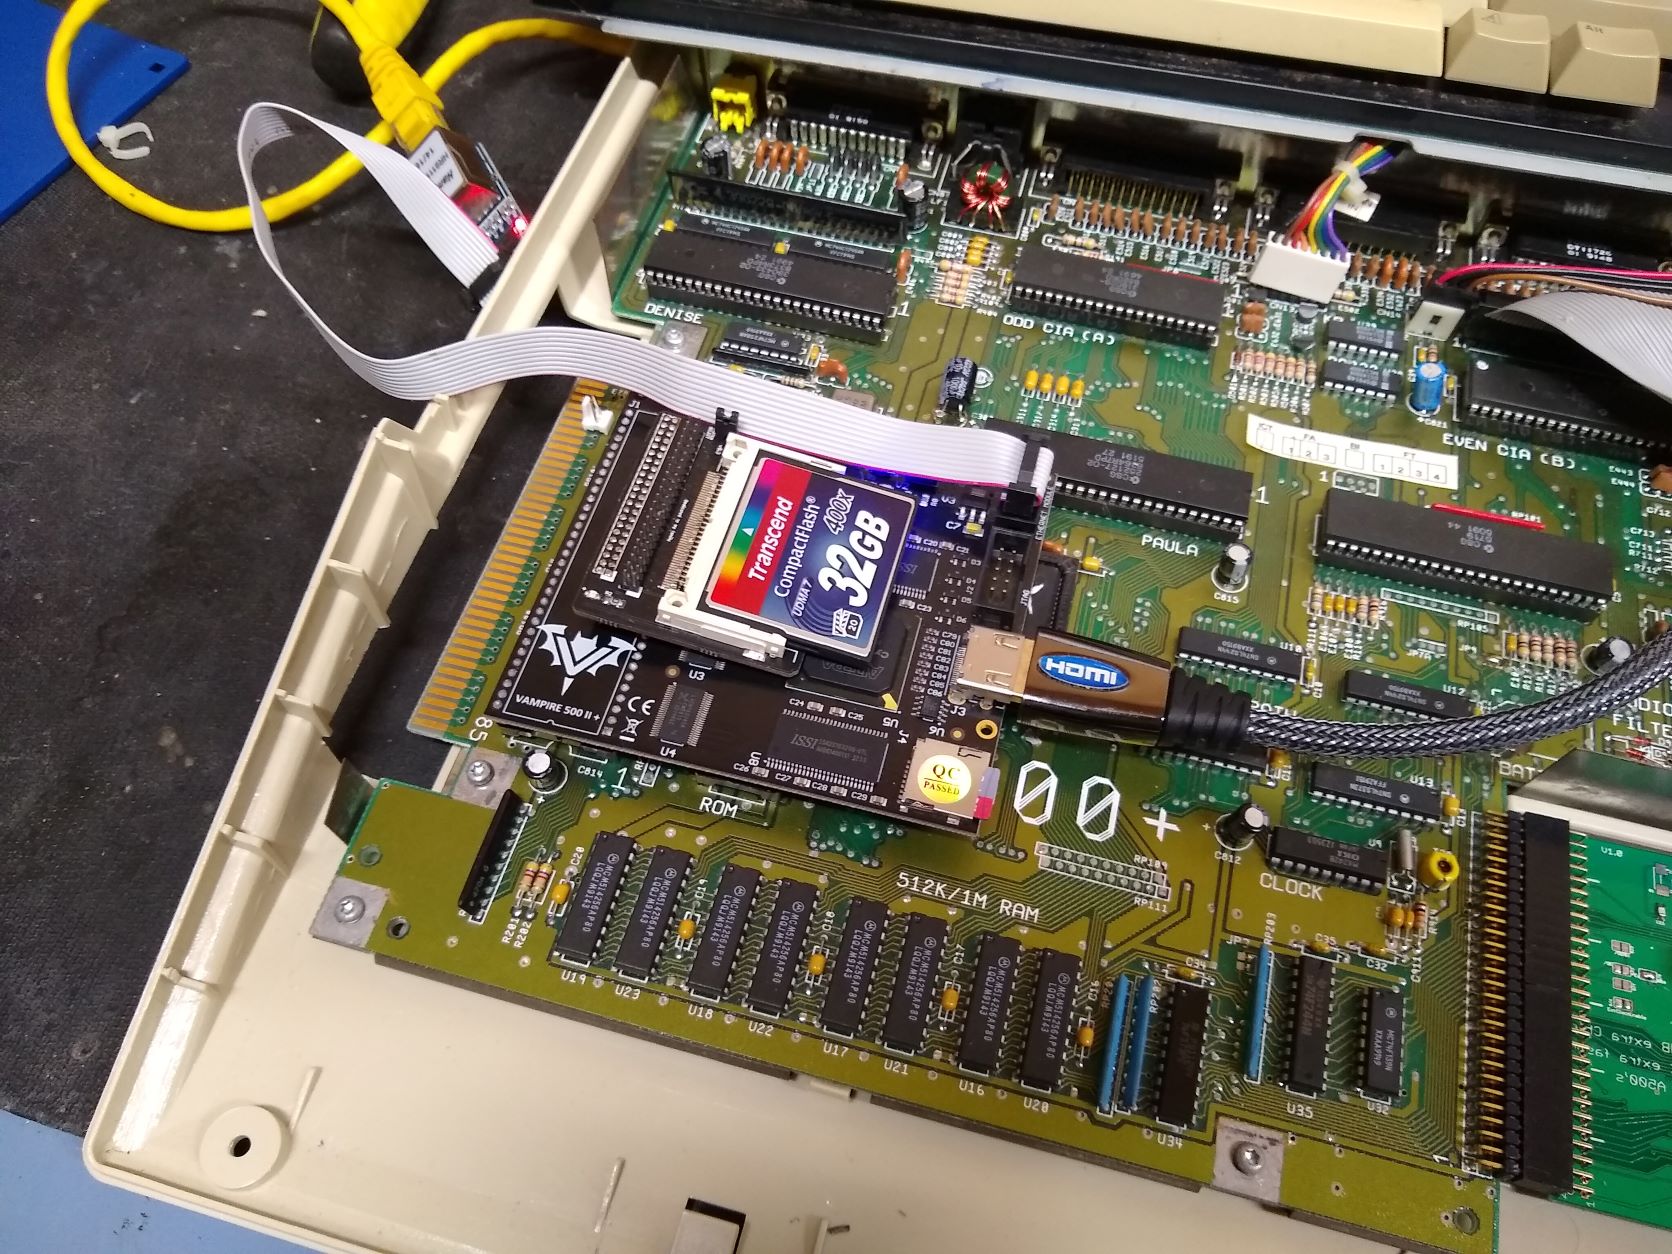
So, supplied CF/IDE adapter removed and all is go!
Time to try out some other Amiga software and games as see how it goes!
As you would expect with an emulated CPU - acting as a 68080 CPU (that never existed) - running on a 100% FPGA chipset you get some issues.
|
|

Again after some discussion on discord and the forum’s I decided to look into running other “more” compatible OS’s than the recommended ApolloOS, keeping in mind that if you want support you need to keep ApolloOS as your base for assistance in fault finding.
To this end I discovered “ApolloBoot”! This is the most amazing piece of work from a very clever developer/hobbyist and contributing/testing group! I can’t speak highly enough of this project!
ApolloBoot comes in 3 flavours – Solo, Trio and OMNI. The latter being my choice as it basically allows you to install, configure and run multiple Amiga OS’s (Including AmiKit - My Favorite) on one CF card in your Vampire!
The installation and configuration of this – is another story – and I am not going to go into it now. Suffice it to say – the documentation supplied and support offered is outstanding!
|
|
|
|


Pictured above is release R83 of ApolloBoot under which I had several – not all listed – OS’s installed, ie; all the OS’s I owned at the time, including my beloved AmiKit. This configuration – within reason – ran as faultlessly as you could expect – software compatibility issues accepted.
I will leave that there for the time being and I do hope others find it helpful, very happy to fill in any gaps I can - that my memory has missed thus far! Just ask! 😉
To repeat my summation points from above:
- It is an amazing little machine (a super amiga in a box) lots of Great fun!
- When you have a working “core” and configuration you are happy with “keep it”
- Special Mention – “ApolloBoot” is even more amazing! It brings it to life!
Point 2 above, leads on to the next part of the adventure – if it ain’t broke don’t fix it!
In order to help test the latest games and functions I elected to upgrade to the latest ApolloOS, which at the time was release 9.2 – and all hell broke loose! But that’s a story for another day.
Thank you.
Some reference links for you:
Apollo Computer – Home of the Vampire: http://www.apollo-computer.com/index.php
Apollo Core – Home of the FPGA Core: http://www.apollo-core.com
Shortcut to Apollo Links: http://www.apollo-computer.com/resources.php#Links
Discord: http://discord.gg/TsKm6ym


I recently got the Vampire V2 working on my A500, the following is some of my learnings and musings.
First, be aware that as far as Apollo are concerned the V2 is old news. They haven’t sold it for over two years, and are concentrating on the V4 line - I got one of the two last ones (the other is also in Brisbane) and it’s sat on my shelf until a week ago. It means you’re kind of on your own. There is a discord chat but I found it a waste of time, and there is a forum on the Apollo-computing page but to be honest it was easier to just figure everything out on my own. If you’ve set up a Pi or another Amiga by writing an image to a card you’ll probably be fine but do be aware some assistance may be needed if you haven’t done it before.
Also be aware that you will end up with two video outputs – one for the RTG from the vampire (HDMI), and one from the Amiga native video (RGB). I haven’t finalised my solution for this yet, but for the time being I will be using a 15 kHz monitor with an HDMI input and switch between as needed. At some point I might change to a TV and use an RGB2HDMI for native video, and switch between to HDMI inputs. Stay tuned.
It's pretty simple to install, remove the ROM and CPU ICs from their sockets and put the Vampire in the CPU socket. If you switch it on now you should see a boot screen on the native output, and should be able to get to an early boot menu. After that's working, write the OS to a CF or SD and plug into the Vampire's IDE port.
The Vampire in the Amiga
My V2 came with an ApolloOS core (FPGA firmware and ROM), not a vampire core CoffinOS. Don’t know why. This led me down a path where I thought I should be using ApolloOS. If you have a V2 don't waste your time with ApolloOS, it's totally geared around the Vampire V4. It looks like a great product but doesn’t run great on the V2, all sorts of odd things don’t work. Just get CoffinOS from https://getcoffin.net/.
Also don’t worry about using the ApolloBOOT software if you’re only using Coffin. If you intend to run a standard Workbench the ApolloBOOT will set everything up for you, but bear in mind it will not work with Coffin or ApolloOS with the V2 – I guess multi-boot is a V4 thing.
Initially had problems booting Coffin from CF; I switched to an SD using an SD to IDE adapter and it worked fine. It was odd because the CF worked fine booting ApolloOS. Later, after I changed to the GOLDv2.15 core, Coffin worked with CF. Strange but it is what it is.
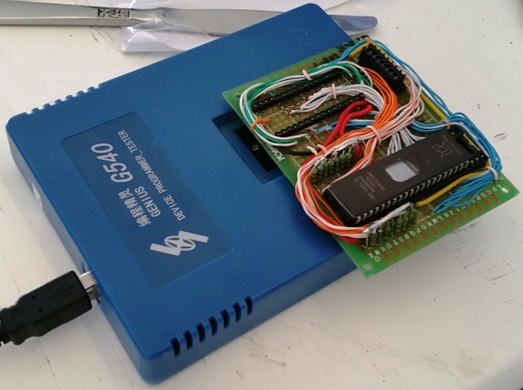
When I did change the core I was going to use version GOLD2.16. Flashing the core was painful with my device. I couldn’t do it at all in software using vampireflash or apolloflash, presumably because it had an ApolloOS core. I ended up flashing it with the USB Blaster and Quartus II programmer, but it failed with v2.16 so I ended up using v2.15. Such is life, it works fine and I’ll worry about v2.16 later.
The ApolloOS defaults to a German keyboard layout. If you do use ApolloOS (or you're on a V4) change the keyboard layout otherwise all your colons (at the end of device names) will be o umlauts, and your z’s will be y’s. Coffin gives you the choice when you boot for the first time.
I recommend getting the enc28j60 ethernet module, they are super cheap modules that are primarily used with the Arduino, but also work with the Vampire. It’s super easy to set up on Coffin, there’s a networikng wizard. Use v2expeth.device for the driver. The driver is also meant to work under WB 3.1 and 3.2, I didn’t test it but I see no reason why it wouldn’t.
Be aware that CoffinOS automatically uses NTP to update the time, but it keeps displaying an hour ahead (i.e. Sydney time). It works fine when I use my own server manually, but I have not yet figured out how change the NTP server to my one. Patience!
Egress of cables is relatively trivial. There are two 3d printed projects on Thingiverse (here and here) that output cables via a new side expansion door. I’m still waiting on parts from AliExpress before I build mine.
CoffinOS itself is really well polished. I like it very much, it plays movies, MP3s, it’s got two TCP stacks built in (AmiTCP, and a demo of Roadshow), built in browser (also a demo), FTP and Samba clients set up out of the box (not demos). All the hard work is done, MUI is there and just works, so is AHI and the graphics drivers. There are a ton of other features I haven’t played with yet, and importantly there’s a pretty big WHDLoad library already set up. You don’t need to do anything; everything is ready to go just like when you set up a Raspberry Pi. It's way easier than setting up AmigaOS 3.1 or 3.2 - if anyone from Hyperion is reading this, that's how an OS should arrive - set up on an image ready to go
(I'd even pay an extra $50 so I don't have to stuff around and set it up, but I digress).
Coffin is also really pretty, and I particularly like the icon set. I didn't think it would happen but this is fast becoming one of my favourite setups. If you only have one Amiga you could do a lot worse than upgrade it with a Vampire and use Coffin.
I know I’m several years late with my little review, but I think it’s a really good product. I might well end up with a V4 at some point in the future.
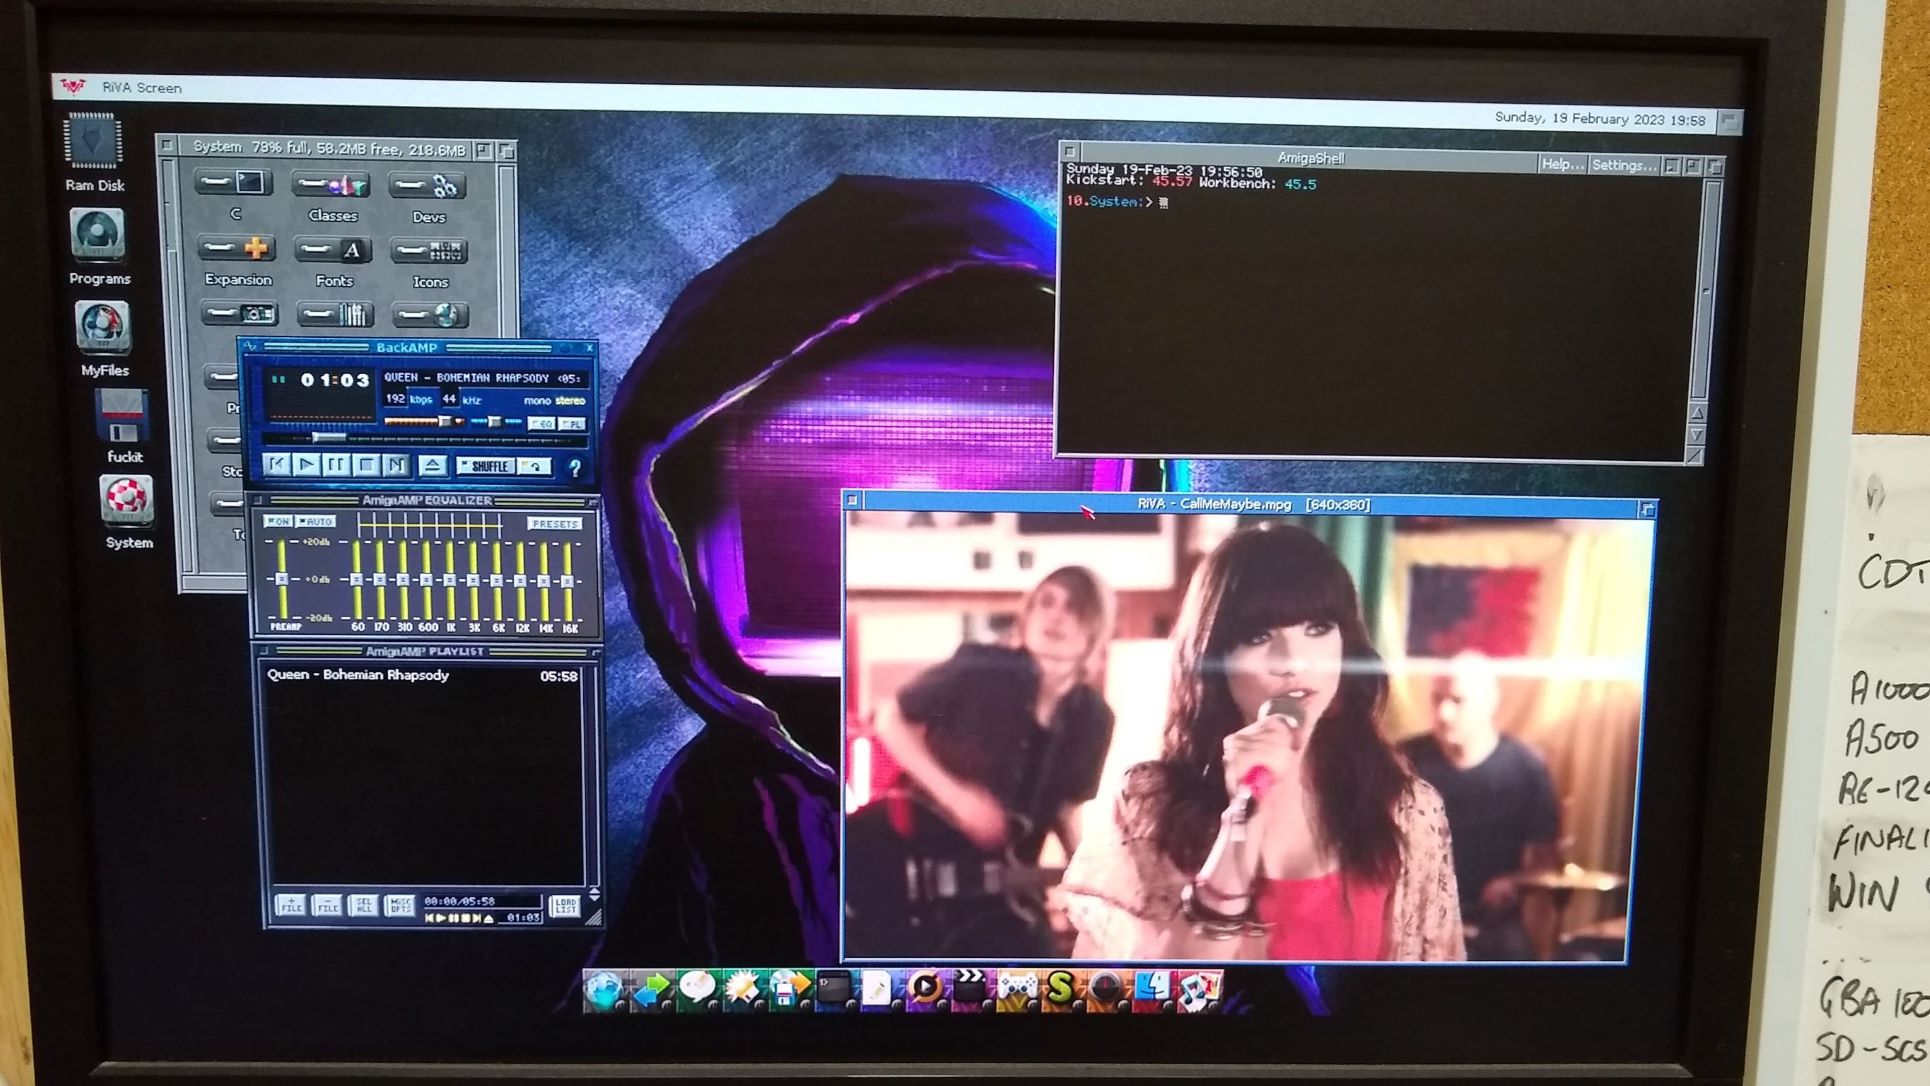
The desktop. I just met you and this is crazy!
This document contains instructions for how to use an 8 bit EPROM programmer to program 16 bit EPROMs. While this is written for the Amiga the instructions should work for all 16 bit EPROM applications, e.g. Atari ST, Sega Megadrive.
For those interested, here is some Background Reading about how ROMs fit into a computer's memory and why this works.
Background reading for Burning a 16 bit EPROM with an 8 bit programmer.
TinyPortal 1.6.4 © 2005-2019